 With high gasoline prices, more expensive air-fares, and high theme park ticket prices, getting away for the summer is certainly more difficult these days, especially if you have a family. If you are facing discontent on the homefront because of your inability to take your clan on summer vacation, why not add a little adventure and excitement at home on those warm Summer nights with an outdoor home theater?
With a little resourcefulness, free set-up and take down labor, and probably less cash than you would have spent taking your family for a week's stay at DisneyWorld, you can combine your home-bound Summer activities of backyard BBQs and Pool Parties with your own outdoor home theater.
Although there are very extravagant ways to set up an outdoor home theater (you can even have one custom installed), you can actually put together a makeshift outdoor home theater that will make you the hero of the Summer!
What You Need
The following is an outline of the components you need to put together a basic outdoor home theater system.
1. A Screen
You can use one or two thick White King Size ironed bed sheets.
If you are using two sheets, sew them together (long sides joined) with white thread. The White Sheet can be used as your movie screen.
DIY Screen Alternatives: In addition to using a bedsheet-type screen, there are also other homemade alternatives. Check out other types do-it-yourself screen projects from: Projector Central, Engadget, and Backyard Theater.com.
Purchase a Ready-made Screen: If making and hanging your own screen is too difficult, you can opt to purchase a large free-standing portable screen; some of these screens are as large as 100 inches.
A pre-made screen will provide a better projected image, due to its more reflective surface, will also add additional cost to your setup, if you are on a budget. However, if you do plan to go with a pre-made screen, my advice would be to get one slightly larger than you think you need as this will give you more flexibility in setting up both projector distance and desirable size of the projected image.
2. A Place For Your Screen
If using a bedsheet-type screen, you can hang your screen on a wall, or hang it from a rain gutter, awning, or clothesline. You can also opt to use or make your own frame (similar to a square trampoline frame, only to be mounted vertically). You must also have a way to anchor or fasten the top, sides, and bottom of the sheet so that it remains taut and does not flap in the breeze. You may also need duct tape, clothes pins, rope, or other fastening material to assist in fastening the sheets.
If using a wall-mounted screen, make sure you have enough wall surface to insert needed hooks or other types of fasteners.
If using a tripod, stand, or an inflatable screen, make sure you have a level ground surface, or platform, to place your screen.
 3. A Video Projector
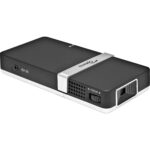
In order to watch a movie on your screen you need to obtain a video projector. Video projectors can be expensive, but there are many "budget" projectors available that can do a serviceable job for about $1,500 or less.
In terms of adjusting the projector distance to the screen, I would just experiment to see what looks best to you under the environmental circumstances. Most video projectors, in the class you would use, can produce a decent image on a 6 to 10 foot diagonal screen. A lot depends on how large a distance you have to work between the screen and projector within your backyard as well. If you have about twenty feet to work with between the screen and back of your yard, this should be enough find a good projector distance.
4. A DVD Player
To watch a movie with your projector and your screen, you need a source signal; this should be provided by a DVD player. Any DVD player could work for this. You have the option of buying one specifically for this purpose, with many good, basic, DVD players selling for less than $99 these days, this is not a major cost. This way, you don't have to unplug your main DVD player from your current home theater system. Another option you have is to use a portable DVD player or laptop computer with a DVD drive that also has a video monitor output for a video projector.
If you prefer, check out some portable DVD player suggestions from About Portable Entertainment as well as a more complete listing of Portable DVD Players.
With the video portion of a backyard home theater outlined, now it is time to consider the audio portion of the system.{mospagebreak}
The Audio Setup For Your Outdoor Home Theater
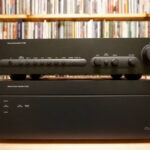
5. A Stereo Amplifier or Two-Channel Stereo Receiver
Next, you need something to provide the sound. You don't have to dismantle the home theater receiver in your main system, just to take it outside for this activity. Ordinarily, in a home theater, 5.1 channel surround sound is the desired goal, however, for the purposes of keeping this project easy, a simple two-channel stereo setup will work. I would go to one your favorite electronics dealers (Best Buy, Circuit City, etc..) and purchase an inexpensive two-channel stereo receiver. Also, if you have upgraded your main home theater recently with a new receiver, you may still be in possession of an older receiver, which you can recycle for this project.
As far as power ratings go, 75-100 Watts-Per-Channel should work fine.
6. Two speakers
Here is where you have several options. You might just want to start off with some basic floor standing speakers. In fact, you may have some decent old speakers in your garage or home that you "retired" when you installed your current home theater system. In either case, this is a good starting point. You can also opt to purchase wall-mounted, in-wall, or outdoor speakers that blend in better with your backyard environment and are optimized for better sound outdoors.
The speakers should placed either at the top corners of the screen or mid-way between the top and bottom of either side of the screen (if wall mounted or in-wall) or below the left and right corners of the screen, if the speakers are the floor standing type. In addition, if the speakers are floor standing or wall-mounted they should be angled in slightly towards the center to better direct the sound towards the listening/viewing area. I would experiment and see what speaker positioning works best.
7. A TV Stand or Mobile Rack
To make it easy to move and place the heart of your backyard home theater system you need a TV stand or mobile rack of some type that has shelves or space to house your components (amplifier and DVD player placed on the lower shelves, and the video projector on top). You can either build your own or buy one at your local electronics dealer or home improvement center.
8. Power Cord and Surge Suppressor
In order for everything to work, you will need a very long heavy-duty extension cord and a three or four outlet surge suppressor. I would recommend getting a twenty-five to thirty foot heavy-duty type power cord, like the thick orange ones you can get at Home Depot. However, if you have outside power outlets along the house exterior or at key points in your backyard, you may be able to get away with a shorter one, depending on the distance between your components and the main power outlet used. Then, all you have to do is plug in your surge suppressor into the other end of the cord and then plug in your video projector, DVD player, and amplifier into the surge protector. NOTE: Do not turn the surge suppressor on until everything else is plugged in, including speakers.

9. Cables and Speaker Wire
Next, you have to connect all your components together. Basically, you need S-Video or component video cables going from the DVD player to video projector and two analog RCA L/R cables going from the DVD player to your amplifier or receiver. Since all your components will be on the rack or stand, three or six foot cable lengths between the components will work just fine; the shorter the better. Lastly, you still need two speaker wires going from the amplifier/receiver to the speakers. My recommendation on the speaker wire is to get a 100-foot roll of raw 16-gauge speaker wire at a local dealer (Radio Shack or Best Buy), and cut to the desired length needed for the distance from each speaker to your amplifier/receiver. If your speakers are In-wall mounted, make you make provisions to have speaker terminals on the wall's exterior that are easily accessible for temporary hookups.
10. Movies
Gather up a selection of your favorite DVD movies. Raiders Of The Lost Ark, ET, Finding Nemo, Pirates Of The Caribbean, Happy Feet, Star Wars, etc… would be good choices. In fact, if you have a swimming pool, you could get everyone in the pool and have them watch JAWS on your big outdoor screen as they float around. Also, there is nothing like fun giant monster movie, such as Godzilla (the original Japanese one, of course), or any of the Ray Harryhausen Classics such as: The 7th voyage of Sinbad, Jason and the Argonauts, Clash of the Titans. Lastly, don't forget the cartoons. There are some great collections available on DVD of Warner Bros cartoons, for instance.
11. Food
There is nothing better to accompany your backyard home theater than some great food, especially BBQ. Enjoy the fruits of your labor.
Additional Tips
In addition, here are some tips that will also help make your outdoor home theater experience a more enjoyable one.
1. Make sure you invite your neighbors over or let them know what you are doing, so they don't get surprised by the noise. Also, offering food to your immediate neighbors might be a good idea to get them to go along with your outdoor home theater.
2. If you live under the regulations of a home owner's association, please check your CC and R's for any restriction or notification procedures for such an activity. It is important to obey any community noise regulations, and be sensitive to any reasonable complaints.
3. Do not advertise or charge for anything. Regarding the public display of copyrighted material, you cannot advertise such a display to the general public (this means you can't legally invite the whole block over) and you cannot charge admission for either the movie or for food in an environment where a copyrighted DVD is being shown, without authorization from the DVD's distributor.
Your backyard is not a commercial movie theater.
4. By all means, place your components well away from the swimming pool and BBQ grill. Be aware of humidity, smoke, water, etc… If you live in one of the Southern States, where it can get very humid, you may not want to place your video projector on the top shelf of your rack, but, instead, place it inside, or on a lower shelf (this may mean you need a taller rack with an additional interior shelf). This will help keep moisture out of the video projector as it heats up.
However, if you do place your projector inside of a rack, rather on top of it, make sure that the projector has plenty of air circulation from the sides or back. Compact video projectors can generate a lot of heat (despite having internal fans) and may temporarily shut down if the temperature of the bulb gets to high – you may have to add a supplementary external fan next to the projector to keep it cool.
5. Check your environment for other factors that could inhibit the viewing experience, such as ambient light sources from street lights and neighbors' properties, as well as outside sources of noise, such as a competing party, airport, or wildlife nearby.
6. Make a storage space in your garage or house for your component rack, sheet, speakers, and power cord. This will make it easy to set everything back up during the Summer and on other special occasions.
Conclusion
Backyard and outdoor home theater can be a really fun activity for the whole family. In fact, setting the whole thing up is half the fun. While you are not going to get the same picture and sound quality you are used to with an indoor home theater, the fun of viewing movies under the stars brings back the days of the drive-in movie, which most of today's young people have never experienced.
What I have presented in this article is a very basic way that you can set up and enjoy your own outdoor home theater. There are many variations and you can get as extravagant as you wish, especially if this ends up being a popular Summer activity for you in the coming years.
For additional resources that may help you, as well as some great photos of Backyard and Outdoor Home Theater setups from around the country, check out the links on the right side of this page.
writer: Robert SIlva


